How to Remove Green Deposits with Vinegar?
At some point, we've all come across green deposits on our outdoor surfaces or even indoor tiles. These deposits are caused by algae, moss, or mildew and are not only unsightly but can also be hazardous, causing slips and falls. Fortunately, there is a simple solution to this problem that doesn't involve harmful chemicals or expensive cleaning products - vinegar. In this guide, we will show you how to remove green deposits with vinegar effectively.
Step 1: Assess the Surface
Before you start cleaning, it's essential to identify the type of surface you'll be working on. Vinegar is a natural acid, and some surfaces may be sensitive to it. For example, vinegar may damage natural stone or corrode metal. If you're unsure, test a small, inconspicuous area first to ensure that vinegar won't cause damage.
Step 2: Gather the Supplies
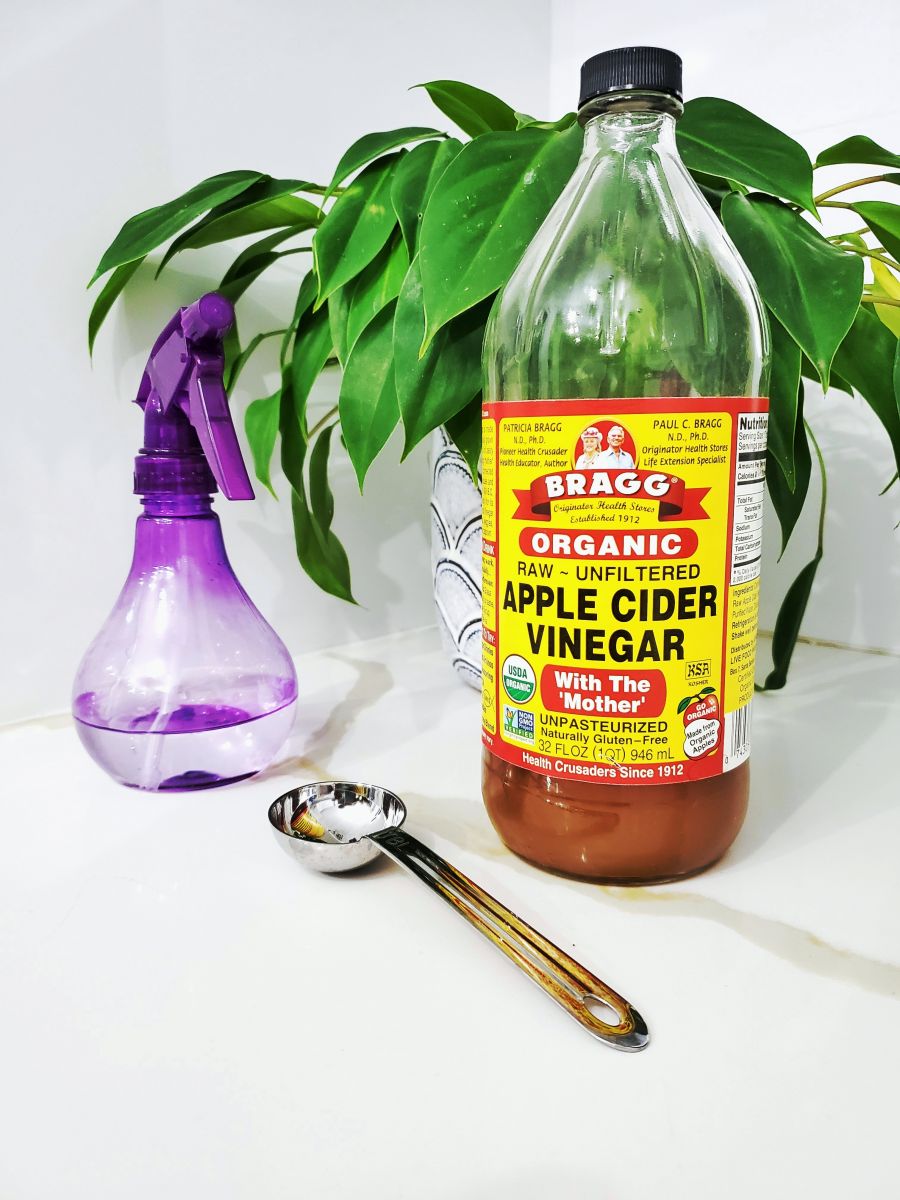
To clean green deposits with vinegar, you'll need a few supplies. These include:
- White Vinegar
- Spray Bottle
- Scrub Brush
- Water
- Protective Gear (gloves and safety goggles)
Step 3: Mix the Cleaning Solution
Once you've gathered your supplies, it's time to mix the cleaning solution. Fill your spray bottle with white vinegar, and dilute it with water. The ratio of vinegar to water will depend on the severity of the green deposits. For light stains, mix one part vinegar to one part water. For more stubborn stains, use a higher concentration of vinegar, up to pure vinegar.
Step 4: Apply the Cleaning Solution
Spray the cleaning solution generously over the affected area, making sure that the green deposits are fully covered. Allow the solution to sit for 15-30 minutes, depending on the severity of the stains.
Step 5: Scrub the Surface
After the cleaning solution has had time to soak in, it's time to scrub the surface. Use a stiff-bristled brush to scrub the green deposits, applying firm pressure. For larger areas, a pressure washer may be used instead of a scrub brush.
Step 6: Rinse the Surface
Once you've scrubbed the surface, it's time to rinse it with water. Use a garden hose or pressure washer to remove any remaining vinegar and green deposits. Rinse thoroughly to avoid leaving any vinegar residue behind.
Step 7: Repeat if Necessary
For tough stains, you may need to repeat the process a few times to completely remove the green deposits. Be patient and persistent, and don't give up too quickly.
Preventing Green Deposits
To prevent green deposits from returning, it's essential to maintain the cleanliness of the surface. Regular cleaning, at least once a year, will help keep algae and moss from growing. Keep the surface clear of leaves and debris that can trap moisture, providing a breeding ground for green deposits. Moreover, considering cleaning jobs in Aberdeen could provide you with opportunities to contribute to maintaining clean and safe environments while expanding your skill set in cleaning techniques.
Removing green deposits with vinegar is an effective, affordable, and eco-friendly solution. By following the steps outlined in this guide, you can safely and efficiently remove green deposits from any surface, without using harmful chemicals or expensive cleaning products. Remember to take precautions when handling vinegar, and always test a small area first to ensure that it won't damage the surface. With these tips, you'll be able to keep your outdoor and indoor surfaces clean and free of green deposits.